(Adding categories) |
(Adding categories) |
||
| Line 72: | Line 72: | ||
[[Category:English]] |
[[Category:English]] |
||
[[Category:Practical]] |
[[Category:Practical]] |
||
| + | [[Category:Backup]] |
||
Latest revision as of 18:17, 21 March 2011
Making the guards and wedges[]
Introduction[]
The guards in bow irons serve a few purposes:
- The longer guard keeps the sideplates from shifting sideways
- They protect the wood of the stock when driving the wedges in
- They make driving the steel wedges in much easier
The wedges are driven between the guards to fix the prod and stock together.
Making the wedges[]
The wedges are quite simple to make. Note that unlike in the pictures shown below, you should start with a thick (~0,8-1,0cm) piece of flat steel. This allows you to make the wedges much wider than if starting from a rectangular piece of steel. If you make too thin wedges as below, one of two things will happen:
- If the slot (in the wood) for the guards and wedges is short, you will not be able to fit in the guards at all
- If the slot is long, you will not be able to tighten the wedges enough
You can work around this problem in a few ways:
- Shorten the bent portions of the guards, so that they can be inserted into a shorter slot
- Make the slot long enough for the guards to fit in. Then, prior to driving in the wedges, add a piece of rectangular steel rod between the guards.
In short, it's much easier to make the wedges from a heavy steel plate. The technique is pretty similar to the one described below.
To make wedges from a steel rod, cut two pieces of it. They should be considerable longer than the width of the stock of the crossbow. You can always cut them shorter later on, if necessary.

Mark the wedge shape to the rods. Make sure that both wedges taper at the same angle.


Next cut the wedges to form with an angle grinder using the thinnest abrasive cutting disc you have.
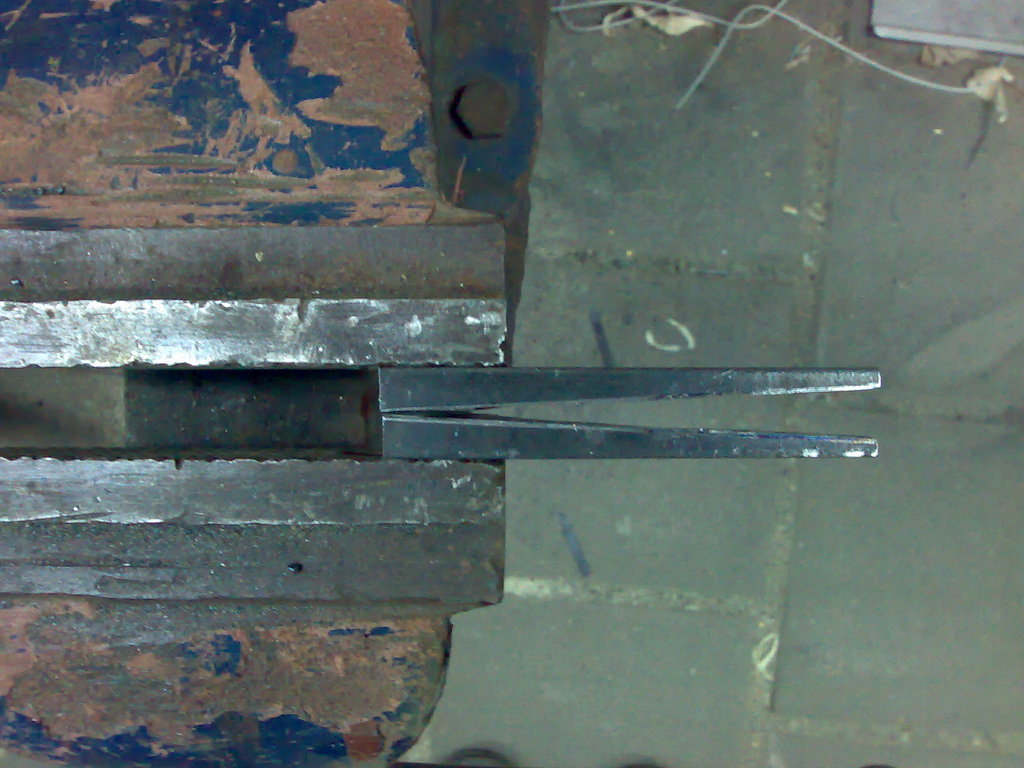
Attach the two wedges to a vise so that they are perfectly parallel to each other. Then carefully file the surfaces you just cut so that the wedges are as identical as possible. Any irregularities in wedge surfaces make them work poorly, as steel wedges don't not give in when they're being driven in with a hammer.

Making the guards[]
NOTE: An alternative way of making the guards is described in this article.
Take a piece of rectangular steel rod that is the same thickness as the wedges. The length of the wedges is determined thusly:
- The rear guard: stock thickness + 2 x sideplate thickness + length of the bent portions + some allowance for the bends
- The front guard: stock thickness + length of the bent portions + some allowance for the bends
Once you've cut the guards to correct length, grind shallow grooves at the correct points to help with bending.
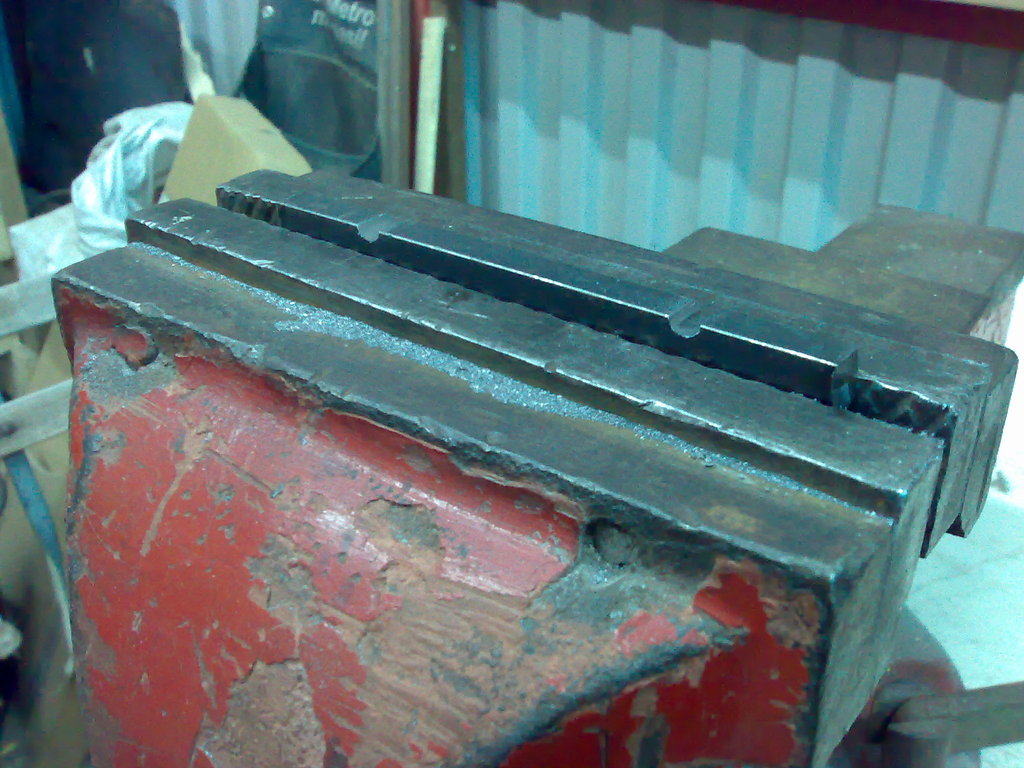
Next bend both ends of the guard in a vise. The guard will be a little thicker near the bend, so flatten those parts with a file. The end result should look like this:

References[]
Alm, Josef [1994] 1998. European Crossbows, a survey. Royal armouries monograph 3. Dorset.
Payne-Gallwey, Ralph [1903] 1990. The crossbow. Medieval and modern, military and sporting. It's construction, history & management. Albert Saifer publisher. London.